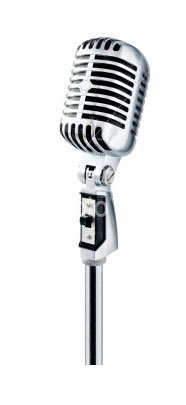
Microphones
Time to warm up the pipes, the microphones are here at last.
If you've ever looked at the mic section of your local music shop or online, you know there are literally hundreds to choose from...
But they essentially boil down to 2 main types: Dynamic Mics and Condenser Mics.
The first step in this selection process is to identify which type is right for you.
In general condenser mics are best suited for vocals and unplugged instruments, while dynamic mics excel at recording loud, shouted vocals and guitar amps.
These differences are based on the fact that each captures sound in a slightly different way.
Both the Dynamic and Condenser options can be found in either the traditional setup consisting of mic preamps or a newly emerging style which uses the USB port of your Digital Audio Workstation.
These USB Mics are fundamentally the same, but with a few very critical differences in what type of recording they support that you need to be aware of before making the plunge.
In short I would avoid these things and stick to the traditional studio microphones.

Browse the above links for more info on each option.
One thing that is common to all microphones is the fact that they detect sound waves traveling through the air.
For some more info on just how these studio mics pickup sound, check out this intro to Mic Patterns.
"But I'm not gonna need vocals for what I want to do."
Fair enough, but you may still want to get a mic on your instrument whatever it may be.
An acoustic-electric guitar, for example, will have pickups on board that can hook directly into your Audio Interface.
Even if you decide to go this route you may find that you will still want to mic your guitar anyway.
Recording both the direct signal and the mic signal will provide additional flexibility during your final mixing.
When setting up your mics in-studio be sure to avoid any potential Feedback situations.
You'll find this unpleasant experience will remain in your memory for a long time.
What are Microphone Preamps?
All mics share one important common feature.
They produce a weak signal on their own, known as a mic level signal, and need to be boosted by an amplifier to line level.
It's best to do this as early in the signal chain as possible so that you know your signal is good before altering during its trip though your system.
This weak mic level signal can be witnessed firsthand if you've ever tried to use a computer's default mic with the 1/8" connector to try and record audio.
The first thing you'll notice is that it sounds like you are playing inside a tunnel with a blanket over you.
Second, you'll notice you have to crank the volume on your sound card just to hear anything at all.
But have no fear, the Mic Preamp is here...and it's closer than you think. It can be found on your Audio Interface.
These are a central part of setting up your home system so check out the links above and make sure you have a good understanding of these before moving on.
Recommended Microphones
Still having trouble sorting through the various options??
Check out my Microphone Buying Guide to see a variety of dynamic and condenser mics that I recommend for home studio recordings.
You really can't go wrong with any of the mics included in that list.
A good rule of thumb to start out with is to budget ~$100 for a dynamic mic and ~$150 for a condenser mic.
Once you have selected the right piece of equipment for your needs, you'll have to think about how to connect it to your setup.
In addition to XLR cables, this means a general understanding of the mic preamps that will be used to drive your signal and get those silky vocal tracks down.
Microphone Accessories
With a few accessories you'll be ready to rock.
Read on to find out about mic stands and click here to discover the world of Pop Filters.
Mic stands come in all different styles and price points.
I prefer the type with a boom that can be used to reach over and around the various obstacles in your studio.
The telescoping boom also gives you some more flexibility if you decide to play sitting at your piano, with your guitar slung around your shoulder or standing up alone for a vocal track.
Spend a few extra bucks to get a quality stand - it's a good investment in your sanity.
The world is hard enough without watching a great take ruined because your mic flipped itself upside down during a session.
Finally, when using a condenser mic it's a good idea to add a shock mount to your stand.
This device basically suspends your mic in a web of elastic bands, absorbing vibrations and preventing them from entering your track.
You'd be surprised how many unwelcome ambient noises and rumblings (refrigerators, air conditioning units, garage doors, foot traffic) can make their way onto your recording and only be heard after the fact.
And that's all there is to it! See that wasn't so bad.
One more piece of the puzzle is now in place.
Feels good don't it?!?


